Monday, October 18, 2010

Kimberly Duke, Project 2

It all started with the mood board and sketches...


The box will be a simple 2 sided box; the front side slides into the back like the box on the mood board above. The packaging for my product will be a filing cabinet.

[Originally... I designed it with the intent that it was to be given as a gift, therefore it will not be visible through the packaging. I was going to make a manila folder booklet with photos and information so the buyer will know what is in the box... then remove it before giving it away.]

Later on I changed it to a box with windows. I had problems with the size of the box, it was too big for the stand. Here are the photos from that point:

The tag that has everything the box includes was stapled to a fabric strip to tie in the fabric on the figure...

And the font at this point was a basic sans serif... I changed that later too.
The final box front fits perfectly, I wrote out "Thoughtfull" in chalk to give it the texture, and it matches the tag. And the manila folder tag was laminated on the top of the box.


Wednesday, August 25, 2010

Jacob project 1, and 2


here are some of my packaging design roughs. I am very excited about where this will be going. I am just starting, and don't have all my ideas on here yet but this will be a great project


so Blogger only lets you upload 5 images at a time. so here is take two.


Jacob Young THE PROJECT 1


joe rawlings /// project 1 ?


FINALLY DONE...


For my packaging I am going to screen print a poster basically and wrap it around a shipping tube. Like I had said in class I don't want the outside of the package to give too much away about what is on the inside. I do want to have fun with it and make people curious about what is on the inside though. Things like "intern inside, this way up to avoid blood rush to the head,…" I want the outside to mimic the look and feel of international packaging but also tie in a bit of the flavor of what is going to be on the inside.

Here is a rough of what the poster would look like. I want to make it mostly typographic on the outside. The White box in the lower corner is where postage and all that jazz goes.
I also did a mock up of the stand that my figurine would be attached to inside of the tube. The round base will be made just large enough that a poster could be wrapped around it and still be able to slide into the tube nice and snug.

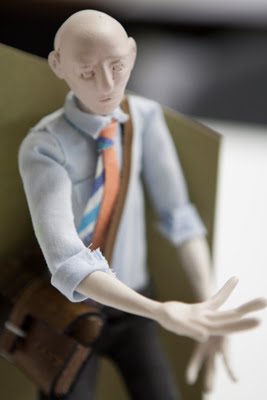
I re-sculpted the face from scratch because it was just to small to work with. I have also been working on the hands, which have been even more time consuming and harder than the face.


I started to work on refining the legs and the over all shape of the figure. I really don't know what I am doing exactly, its just all guess work. Good thing that we have our diagrams to look at for scale and dimension.

I still have a ways to go but I have been really enjoying the process so far.


The latest...


Here is my orthoscopic view. I know that I am supposed to have a solid idea that I want to roll with by now, but I am still not quite sure what direction I am going to take this just yet. I know that I want to do a male figure so here is a scale that I would like to go off of for the figure, but I am not so sure that I am going to have him look like this.

...the Idea phase is always the hardest for me.

I am excited to get started with the armature and learn the ins and outs of the whole process. I think this will be very beneficial to know how to do.